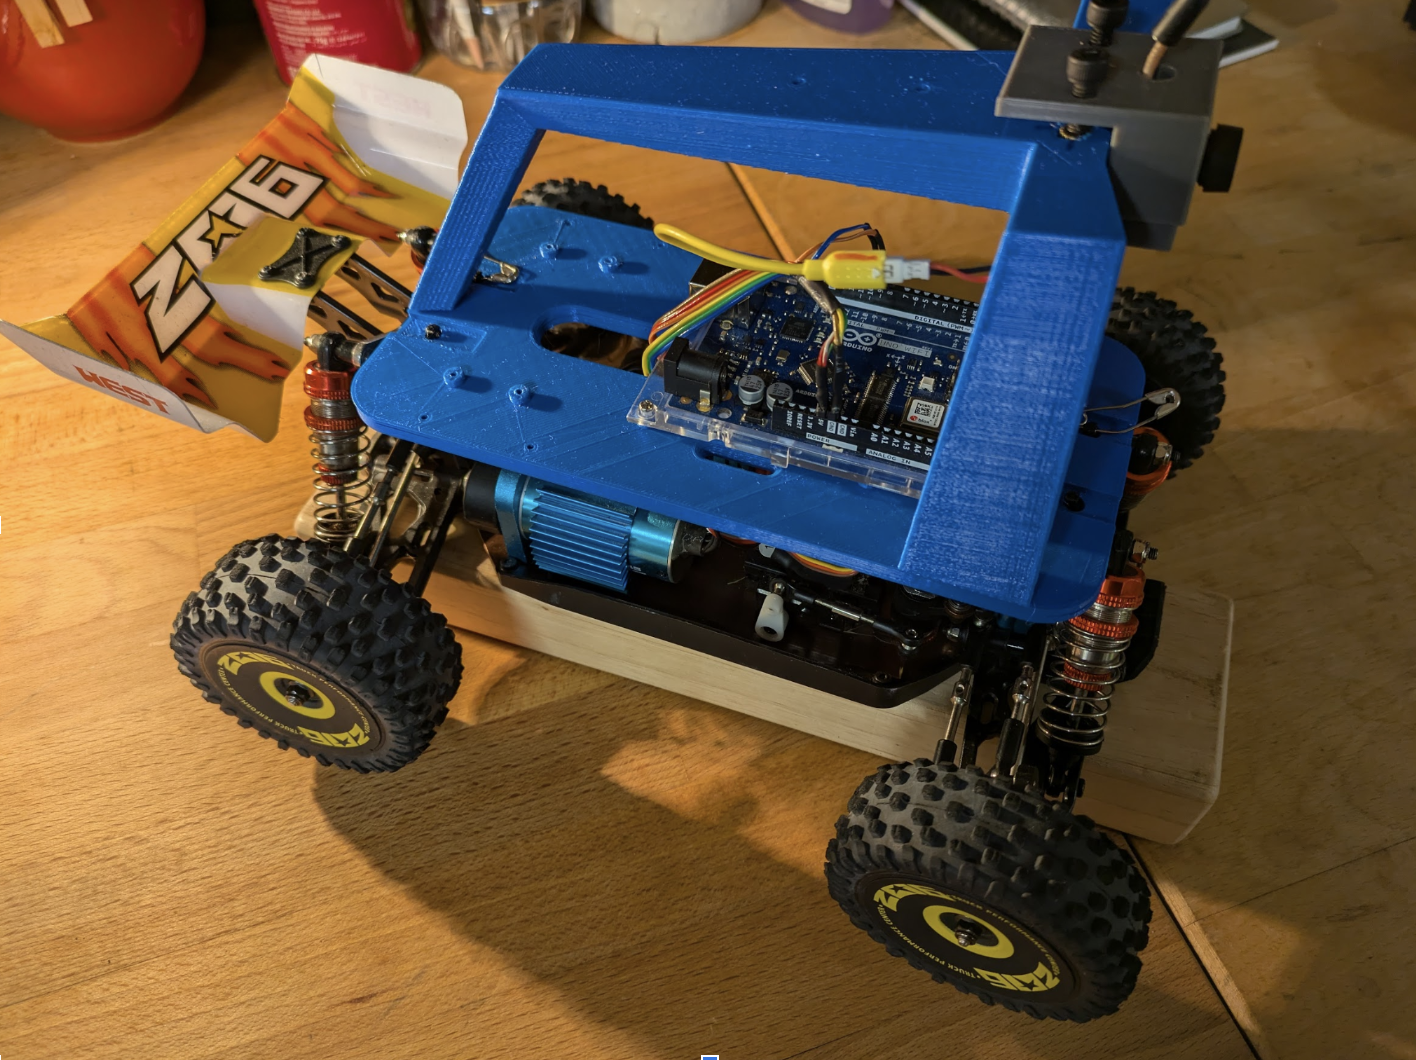
In the last six months, I’ve made considerable progress on Carbot. It is now ready for testing and iteration. There were several key factors that contributed to this success, which I’ll discuss before explaining how it works.
Key Factors Behind Carbot’s Development
ChatGPT: My Coding Partner
Having written software for 30 years, I’ve learned that focus is critical. ChatGPT has been invaluable in helping me stay focused by acting as a conversational partner. It’s been particularly helpful when I’ve encountered roadblocks like bugs or deprecated libraries. Additionally, ChatGPT assisted with high-level planning. For example, I initially planned to move all image processing into Google Cloud Storage. ChatGPT pointed me toward Firebase as a simpler and more efficient solution. Within 30 minutes, I had a working prototype for file transfer and processing—a task that could have taken months otherwise.
Learning from Donkey Car
I experimented with Donkey Car, an RC car project that uses Raspberry Pi for autonomous driving. While the experience was frustrating (especially getting the camera to work reliably), it provided valuable lessons. For example:
- I learned the importance of using an RC car with a built-in Electronic Speed Controller (ESC).
- I decided against using Raspberry Pi due to its complexity and opted for an Android phone, which is powerful and familiar to me.
Android: The Brain of Carbot
Android phones are powerful computers that I already know how to program in Java/Kotlin. They’re perfect for running TensorFlow Lite to build the autopilot. With a $10/month Google Fi data plan, I can remotely access the device. Plus, I regularly upgrade my phones, so older devices can be repurposed for Carbot.
How Carbot Works
In general when you build something like this I like to think in terms of a pipeline. Essentially, asking the question, what tools will I need to assemble to accomplish a goal. My goal is to make an RC car drive around my block autonomously. To do this the vehicle has 2 modes; data collection, and autopilot. For the data collection it simply captures images periodically from its forward camera and then saves that along with the control data to a json file onboard. Basically it is just recording what it sees and what the driver of the car is telling it to do. We then copy all of those files and data through Google firebase into the cloud to be processed. The files are saved into a folder that marks the date and time of the recording so that we can choose to skip the files if we decide they are not helpful or polluting the model. Once the files are in the cloud we can pull them into Vertex.ai which is Google specialized Jupyter notebook used for machine learning. I then can construct models that process the files and produce a tensor lite file which is then saved back into firebase. Finally back on the car, I can download these tensor lite files as “brains” which are installed and used as an autopilot.
Workflow Summary:
- Drive the car and collect data.
- Upload the data to Firebase for processing.
- Train the model in Vertex AI and download it as a “brain.”
- Test the autopilot mode and iterate.
Electronics: Simple and Effective
I’m pretty proud of this part because it came out so simple. I have included the circuit but it really is just a specialized wiring harness that has 6 connectors on one side and 4 on the other. The circuit looks like this
 Once you put it together it looks like this.
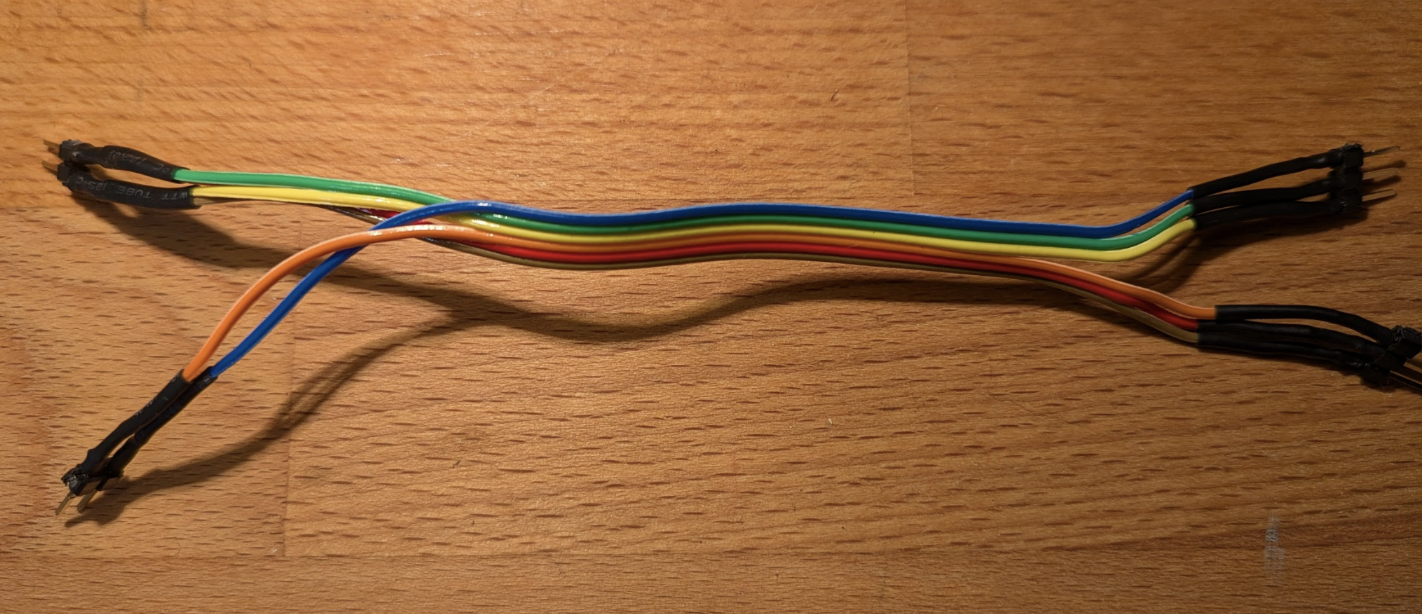
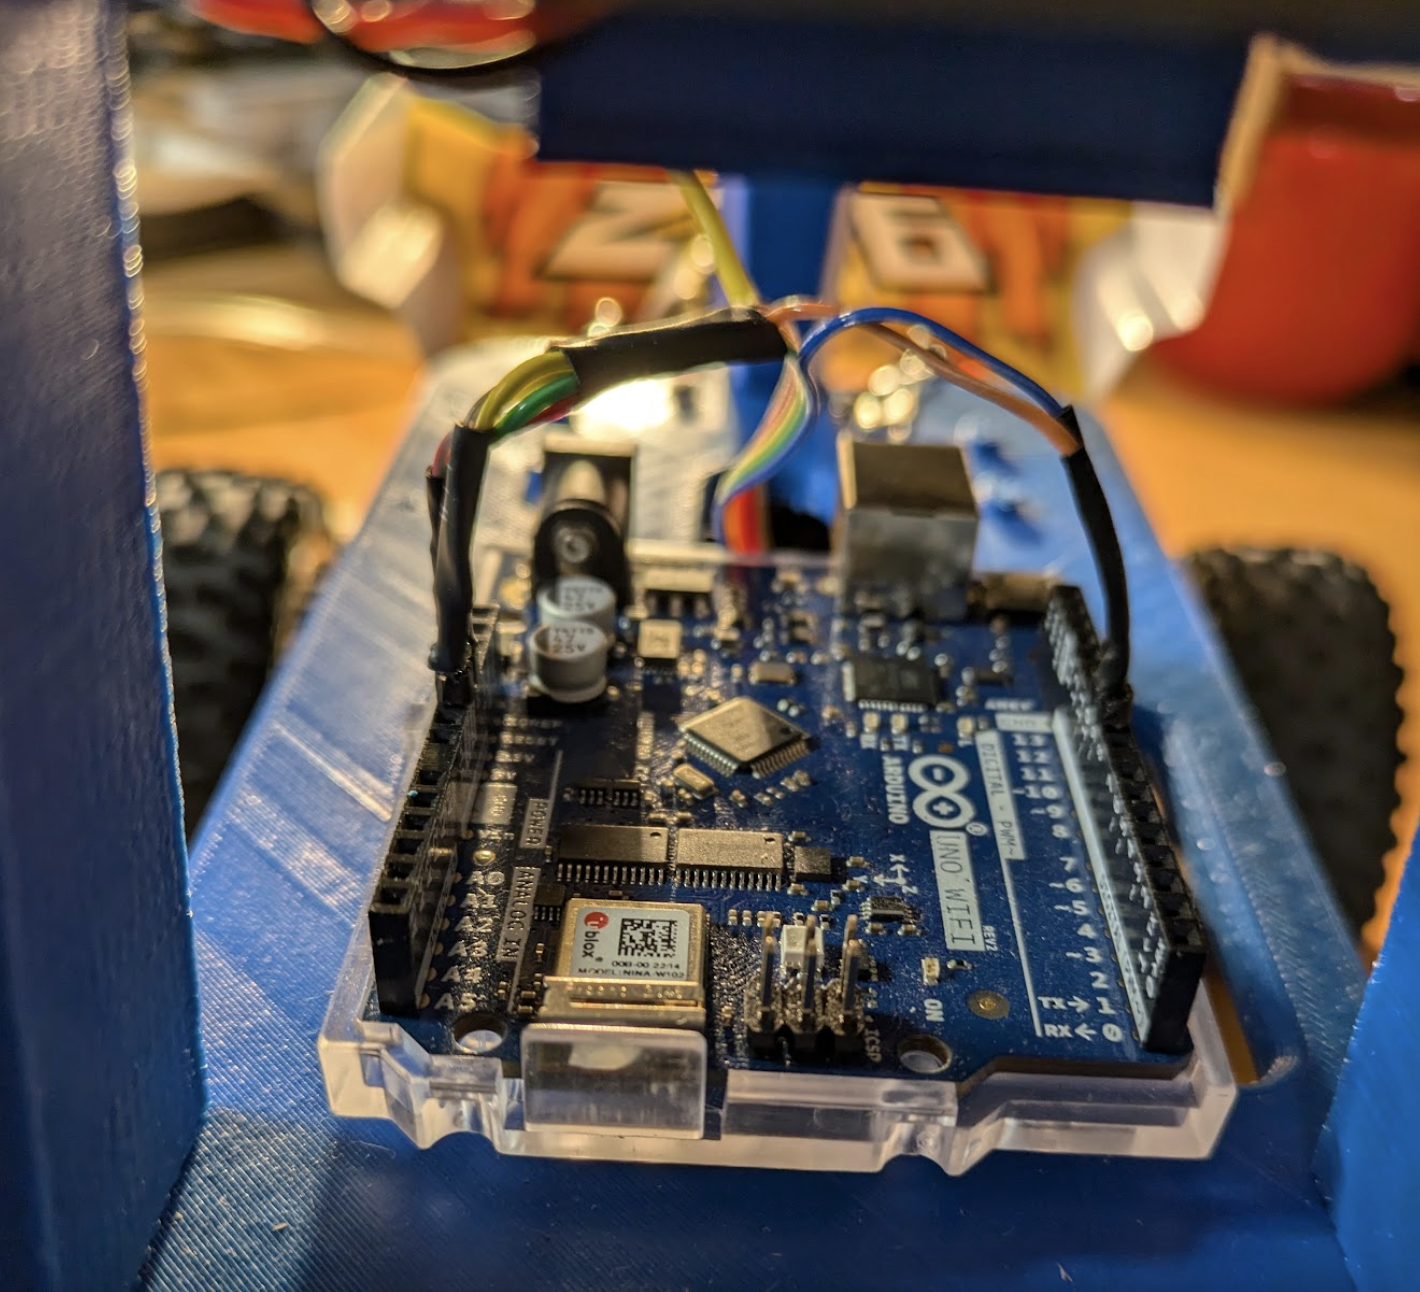
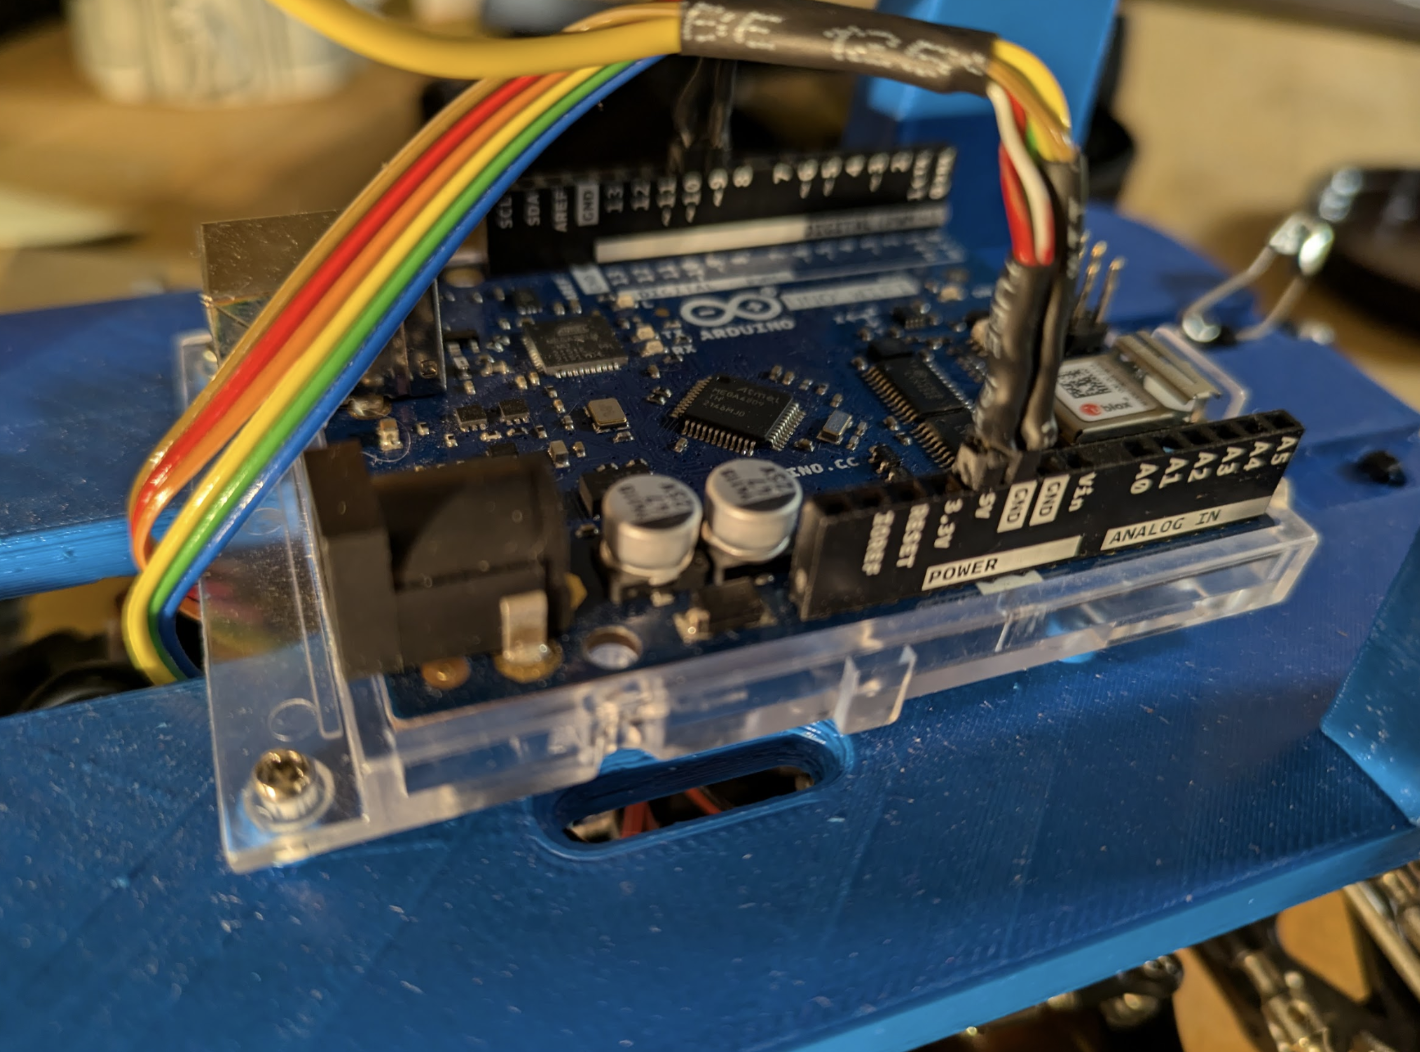
One really unexpected feature that materialized from this experimentation is that I can use the car power supply to power the Arduino BLE thus I didn’t need a separate power supply for the Arduino
Arduino Code
The Arduino code listens for Bluetooth commands to control the car’s steering and throttle. By isolating expensive components (like the phone) from high-power batteries, the system remains safe and cost-effective. The Arduino also enforces a governed speed to prevent the car from exceeding safe limits.
I’m using an Arduino UNO as the controller. This $50 bit of electronics will live onboard the car and interface with the servo and the motor controller. The code for this can be found here. It is a very simple program that really just looks for a blue tooth connection and then allows whatever is connected to it to specify the servo setting that steer the car or the setting that tells it how fast to go forward or backward. This keeps any more expensive electronics, like the phone, from having to be connected to the powerful batteries used to drive the motor. In the case of a surge the worst that can happen is it will fry the Arduino, which is easily replaced.
RC Car
I also did this to provide some safety for the whole system. The car I’m using is the WLtoys 144010 RC Car, and it can get up to 40 MPH which I think will be a while before we feel like the system can handle this sort of speed. So the Arduino is set with the most minimum setting that allows it to move forward and backward. I thus am governing the top speed and there is no way the Android or the AI can go any faster than what the Arduino is governed to.
The Android App
Ultimately I want the Android phone to be on the Carbot. I envision a setup where the phone will be placed screen down and in a protective shell. The camera needs to be exposed so I am imagining a periscope or prism on top of the device that will transfer the image of what is in front of the car down to the phone underneath. I still want the phone to be separate from the reset of the system to protect it electrically. Think of it as the brain blood barrier for the robot. The Android phone will be the brain and the rest of the system will just be the electronics and muscle to propel it forward.
Until the system is ready for full autonomous driving there is a bit of work to be done to just figure out if the tensorflow model we are creating is of any value. Thus the process that is described above. However if you want to get a sense of what the Android app looks like, here is a screenshot of it in its current state.
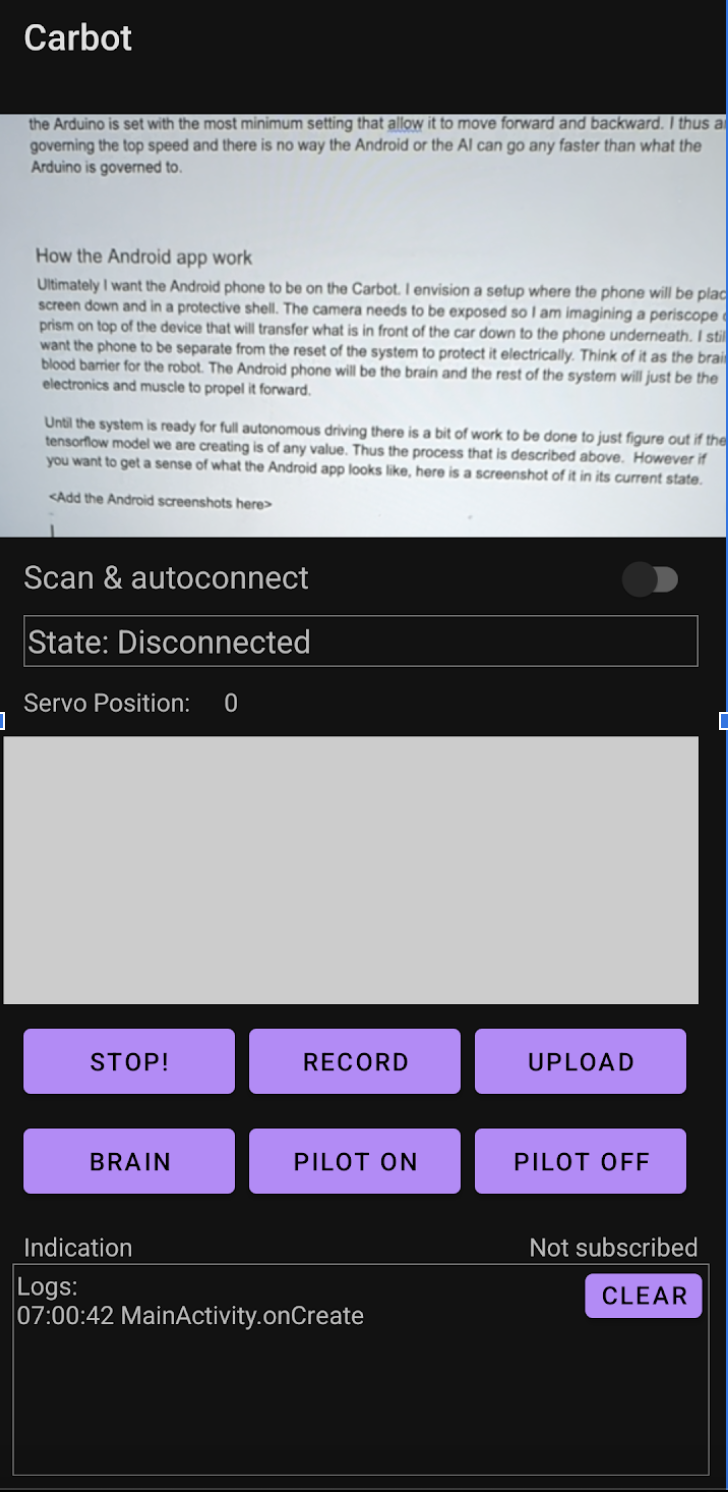
App Features:
- Camera View: Shows what the car sees.
- Controls: Bluetooth connection, driving controls, and functional keys:
- Stop: Is my emergency stop switch that stops the Carbot from doing anything.
- Record: Starts the recording on the phone where it will capture the positional information and the image being viewed.
- Upload: Moves the images and positional information up to the cloud server.
- Brain: Download the TensorFlow Lite model back down from the server
- Pilot On/Off: Toggle autopilot mode.
The top part is the camera view which just shows you what Carbot is seeing. I then have the controls for connecting to the Bluetooth controller and what state it is in. Below that is the touch screen area for controlling the forward, reverse, and side to side controls. The next section are the functional keys for managing the system.
If you are trying to recreate what I have done. The way you should use this app is to get it running on your android device, then first use “Scan and autoconnect” to get to the BLE. Test that you can drive forward and control the device. Then when you have a course setup for the car, start the recording and drive the course. After you get a good capture of the path, upload it to your Firebase setup and then do the processing in the cloud. You will need to manage your own Firebase instance and Vertex.AI to generate the Tensorflow lite file to be used as the brain. Once you have created that TFLite file you will be able to move it back onto the phone and then use it as the autopilot.
Camera Setup
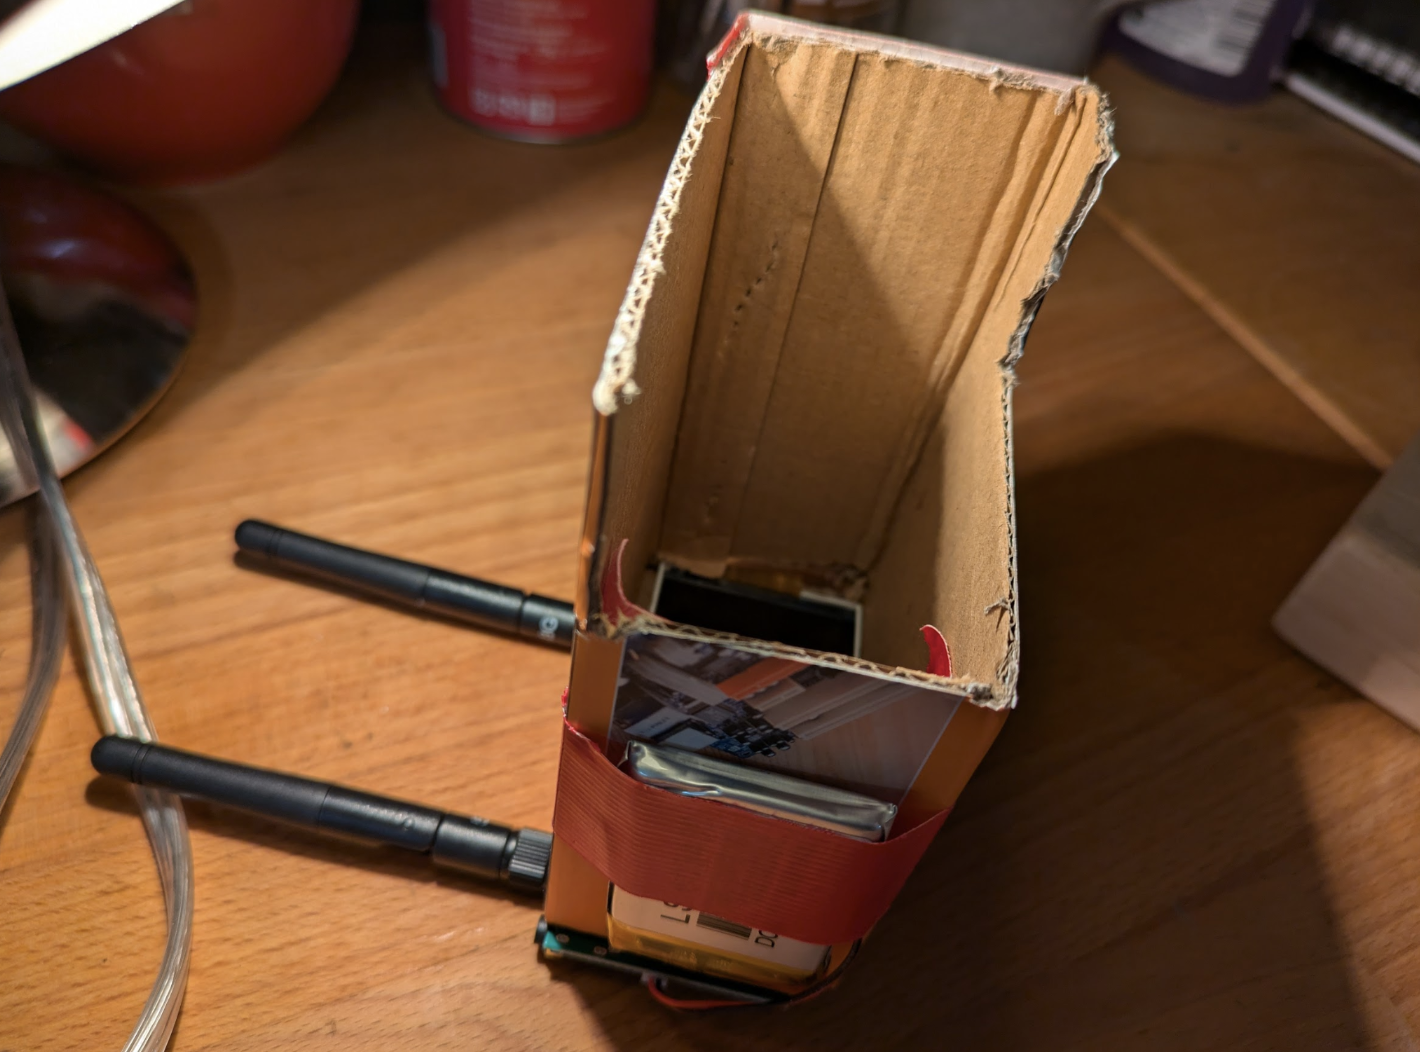
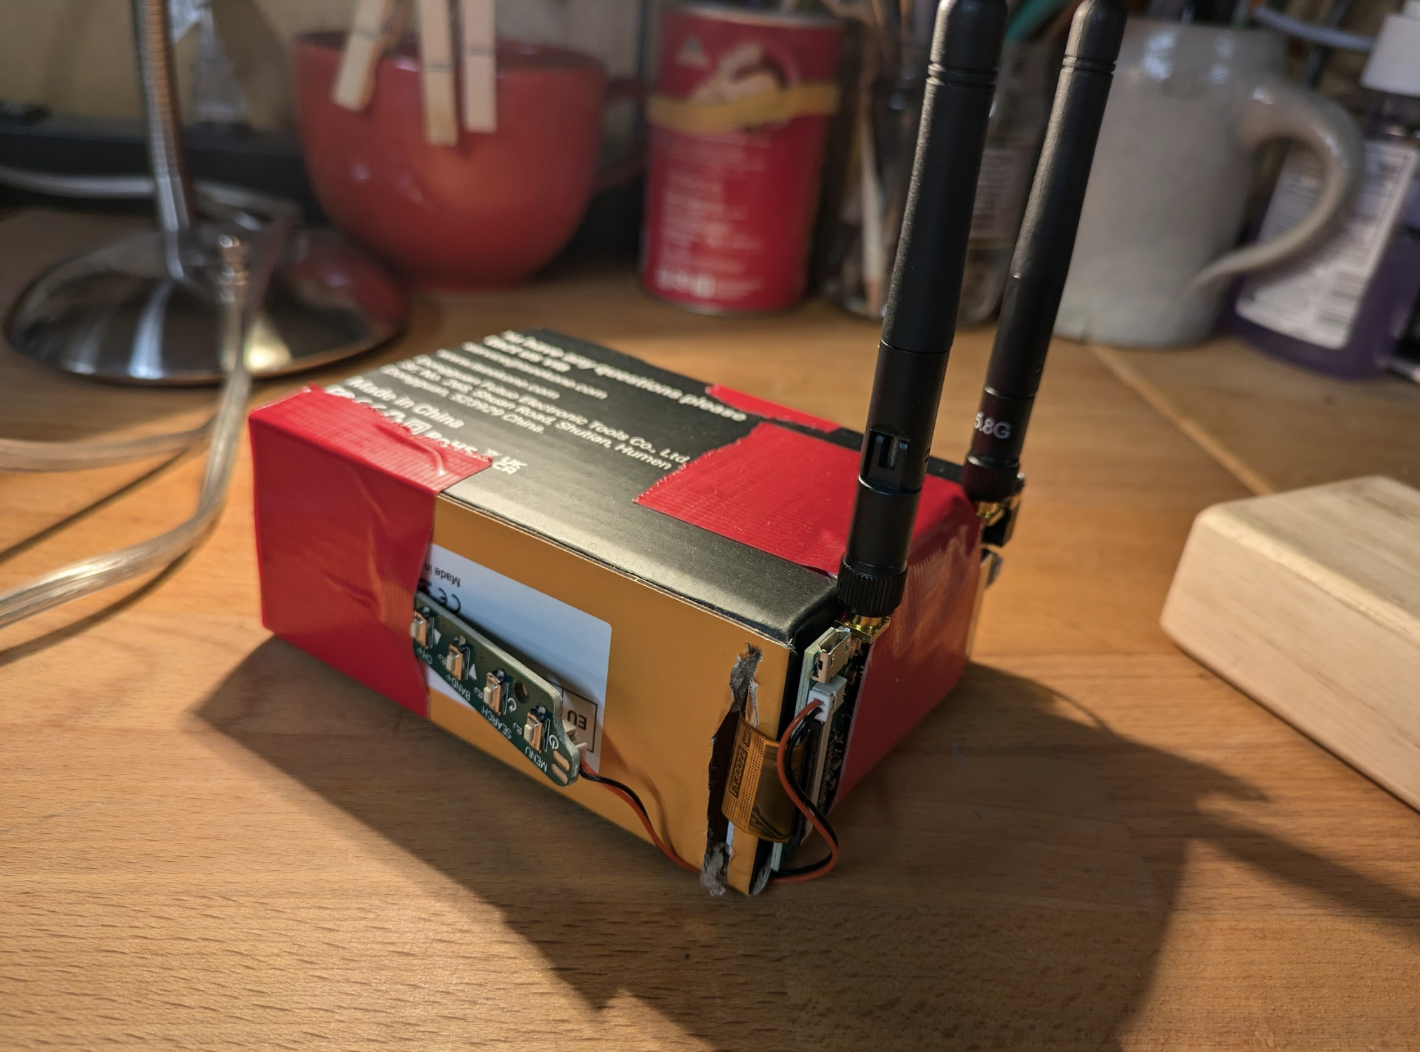
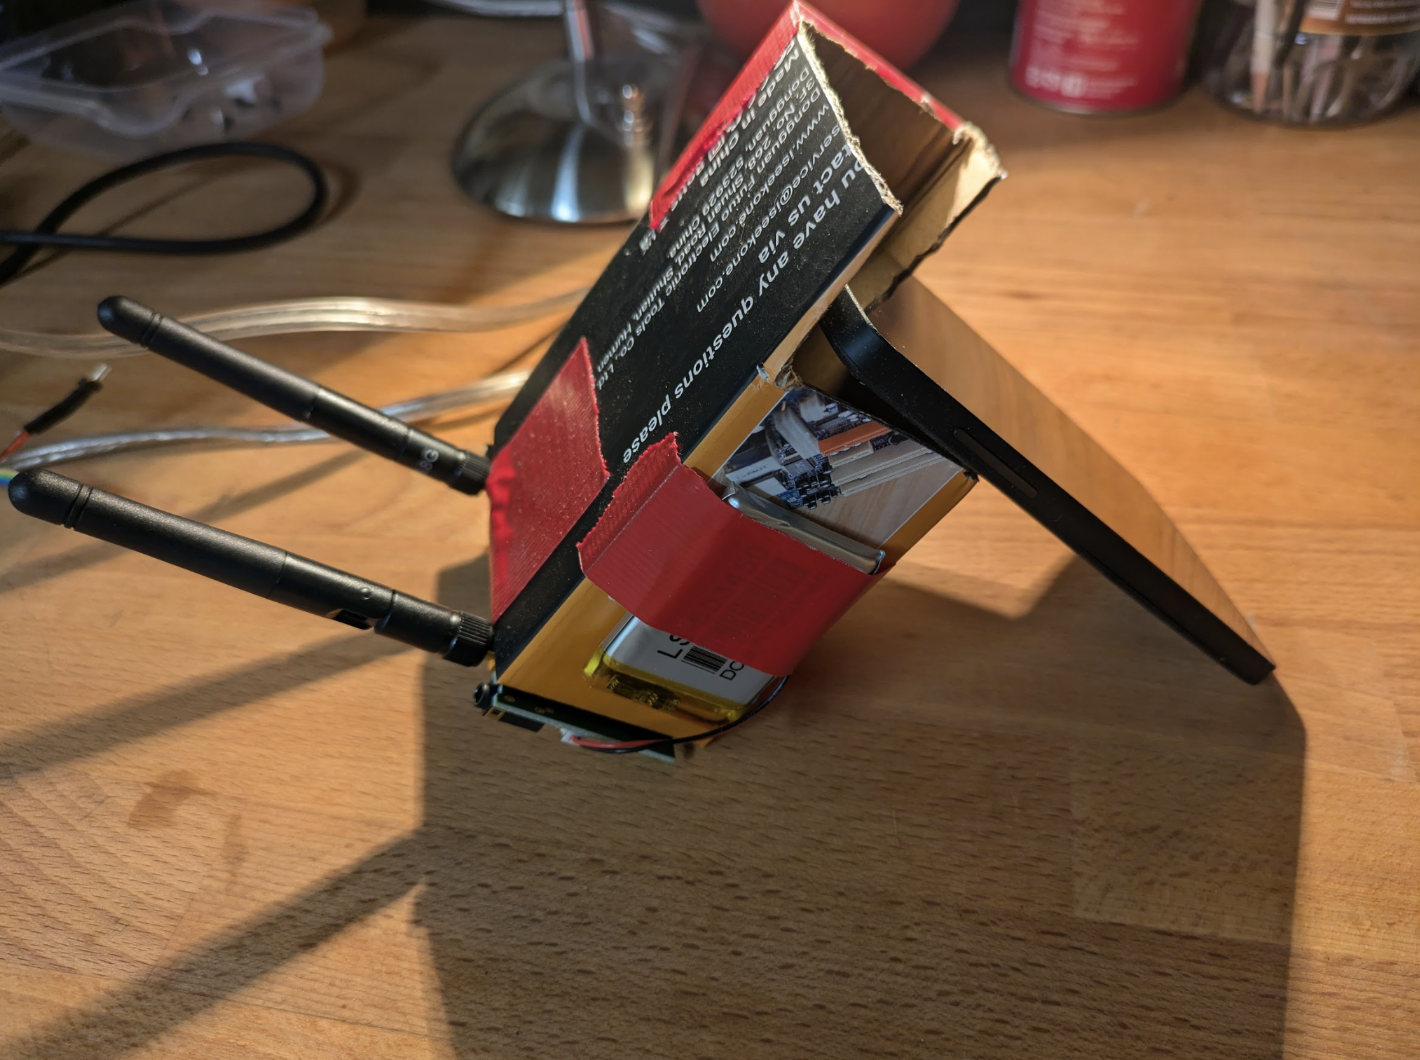
This part is pretty janky, I admit it. It really is under the philosophy of “What is the least I can do that could possibly work?”. In this case I disassembled a drone headset and made a box to mount in front of the phone camera. All it is doing is holding the screen far enough in front of the camera so that the phone can see what the car is seeing. I did this because figuring out how to get the video feed from analog back to digital and into the phone was feeling like a waste of time. My plan is to eventually have the phone on the car anyway so all of this is temporary. Thus I used some cardboard to form a way to mound all the pieces.
The resulting device looks like this
Parts List
To replicate Carbot, you’ll need:
- WLtoys 144010 RC Car
Buy on Amazon - Arduino UNO with Bluetooth
Buy from Arduino Store - Donkey Car Partial Kit
You can get this Kit from the DonkeyCar Store. I really only used for the frame in the future it will make more sense to design my own. - Camera and Headset I hacked apart a cheap drone headset with camera to install a camera onto the device. It was from 2 years ago and now I’m not sure what I bought. But it isn’t hard to find a similar camera. One thing to note is that I don’t expect this phase to last long. I would like to get a phone mounted on the car and have another phone talking to it as the controller. So if you want to recreate this part you will need to see what is in the market that can have a camera and a little screen to mount in front of your phone.
Services
- Firebase for hosting the web service for storing files and the finished “brains”
- Vertex AI accounts for data processing and model training.
software
These are the github repos you will need to work with to install the software
- Arduino BLE software Carbot Dev
- Android app to add to your phone Carbot Android Project
What’s Next?
For me we finally get to the fun part. Trying this whole setup out. I’m going to start by just trying to get it to drive in a circle in the basement on autopilot. Then to try progressively harder tasks. I’m not sure what yet. The goal is to eventually get the phone to be onboard with the car. So I will probably need to come up with a way to control the Android phone with another phone. Thus using one of my older Androids as the onboard brain and my normal phone as a way to tether to that phone. What is cool is the amount of capabilities. On the android I have the ability to see GPS, access to maps, access to just about anything really.
- Step 1: Drive the car in a controlled environment to gather data.
- Step 2: Train the autopilot model.
- Step 3: Test progressively harder tasks until the car can navigate autonomously.
Ultimately, I just want it to drive around the block. Stay tuned!